
Hashnode Headless: A Content Engine for Tech Companies
The latest headless CMS brings a lot of community power along with it. Here's how to get started with the Hashnode API.


It’s always a challenge to decide what software to use to drive your technical blog content. With its new Headless option, Hashnode offers a solution that gives your technical content creators a powerful collaboration platform while giving you full control over how — and where — it’s rendered.
What is Hashnode Headless?
A headless Content Management System (headless CMS) is a content management system with a robust back end but no opinionated front end. They offer a robust set of back-end tools for content creation and management but no default UI for viewing the content. Instead, software developers can integrate the content into their company’s sites via Application Programming Interface (API) calls.
Traditionally, CMSs supported front ends with complex templating systems that developers could style to their liking. Such systems are often hard to understand and use. It can also be challenging to tailor a template that fits seamlessly into your existing site design.
With a headless CMS, you can access your content via API and render it in whatever site structure you choose. This makes it easier to make your blog or other managed content feel like an integrated element in your site.
Headless CMS aren’t new. Strapi is the leader in this area. You can even operate many traditional CMS, such as WordPress, in headless mode.
Hashnode’s entry into this arena is exciting. The site has long been a hub for great technical content. Now, companies can use it as more than just a syndication channel for their best pieces — they can use it as their primary blogging platform.
Benefits of using Hashnode Headless
Get a rich authoring environment for free
Until now, many companies have had two options for running technical blog content: A full-fledged CMS like WordPress or a lightweight static site generator like Jekyll or Gatsby (now merged with composable dev platform Netlify).
Static site generators have been most company’s go-to solution. They’re easy to set up and apply basic styling. Plus, they’re cheap! Hosting content means paying a few bucks to host files in an S3 bucket. By contrast, hosting WordPress is neither cheap nor painless.
But static sites don’t offer a good — actually, any — WYSIWYG editing experience. Plus, collaborating means collaborating through Git. That’s doable, but a pain for anyone who doesn’t work in Git on the daily.
Hashnode Headless provides the best of both worlds. You can write and collaborate with teammates in a feature-filled, easy-to-use editor. For publication, you can host your content wherever you want — including in a static site.
Access Hashnode’s user base
All Hashnode articles are distributed on Hashnode’s robust and growing network. With Hashnode Headless, you can publish your content on your site while also making it available to Hashnode’s educated audience of software engineers, data engineers, and other technical experts.
Leverage other Hashnode features
Using Hashnode also means you get to leverage a slew of other great Hashnode features, including:
Email newsletter subscriptions
Optimized image delivery via Hashnode’s Content Delivery Network (CDN)
Webhooks to automate integration with third-party systems (e.g., social media sharing)
Integration with GitHub, which enables static site publishing through a DevOps-based workflow
Group collaboration and team management
These are tools you’d likely build yourself anyway. With Hashnode Headless, you get them for free.
Adding a front end easily
What if you don’t want to spend time designing your own blog front-end from scratch? Hashnode has a solution for that, too. Its Next.js Starter Kit lets you set up a front end in minutes. Once running, you can build more UI features in Next.js to create exactly your desired appearance.
Hashnode has a good walkthrough on how to set up the Next.js Starter Kit in a few minutes on Vercel. You can set it up as a subdomain or a path on your main domain (i.e., mycompany.com/blog).
(FYI, from an SEO standpoint, there may be some benefit from hosting your content in a subdirectory than on a subdomain. But that’s a complicated subject for another post…)
Building your own front end with Hashnode Headless APIs
What if your site isn’t written in Next.js? What if you need to integrate Hashnode into a different server-client framework?
In this case, you can use the API directly. The Hashnode Headless API is built using GraphQL, an API query language created by Facebook. Don’t worry if you haven’t used GraphQL before — it’s pretty simple, and I’ll hit the high points below. (You can also read their Learn page, which is a solid introduction to the language.)
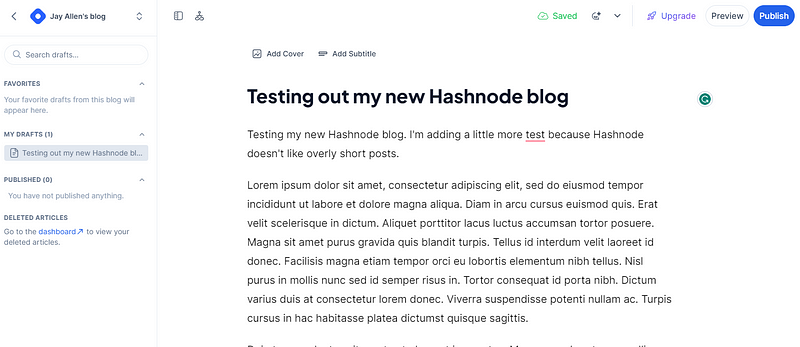
To get started, create a test blog on Hashnode. I made mine at jayerculetest.hashnode.dev. I put up a single post to test retrieving it via GraphQL API calls.
Next, create a GraphQL query to retrieve the posts on your Hashnode blog. To do this, use the GraphQL Playground at https://gql.hashnode.com/. This is also the endpoint you’ll hit via HTTP calls to make GraphQL calls on Hashnode. If you navigate to it via a browser, you’ll see an editing window with a helpful auto-complete engine to assist in creating GraphQL queries.
The Hashnode API consists of two types of requests: queries and mutations. Queries are read-only, while mutations create or change data. Since Hashnode posts are public anyhow, most queries are unauthenticated. Mutations require passing an API key (which I’ll discuss briefly below).
GraphQL works by defining an object model against which callers can make queries. In the Hashnode GraphQL mode, the top-level object for a blog is a Publication. A publication contains multiple sub-objects, including a list of posts.
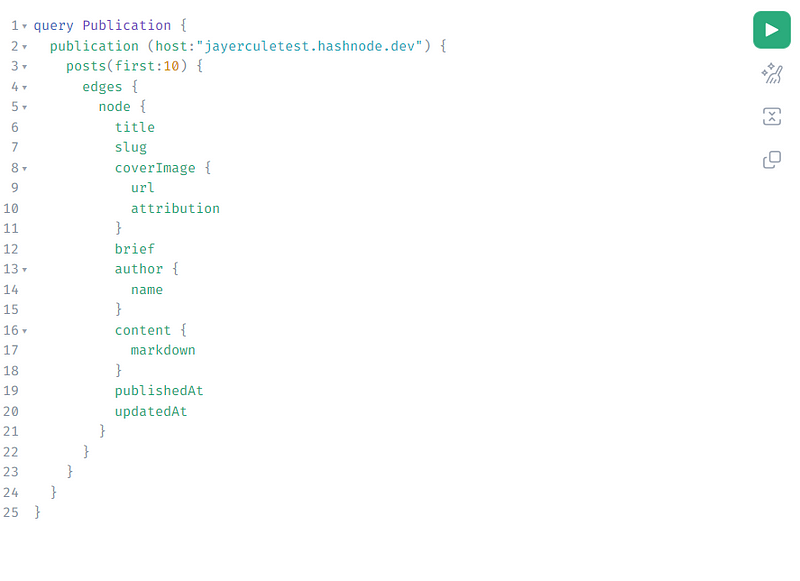
To select the list of the first 10 posts on the publication, we can use the publication query. Here’s an example. (I’ve also supplied this in text in a GitHub Gist.)
For those unfamiliar with GraphQL, there are a few key things to note here.
First, the posts object takes an argument of first to determine how many initial posts to return.
Next, the list of posts consists of two subobjects: edges and nodes. An edge contains a list of post objects (each one represented as a node) and an optional cursor to enable pagination. As the GraphQL documentation explains, we can enable pagination by asking for a cursor object back and then supplying it to the posts object as an after argument.
Finally, you’ll see in the node that we ask for a specific list of fields on the post object. These aren’t by any means all the fields available on post. A big appeal of GraphQL is that we can query only the response data fields we plan to use. This keeps responses compact and fast. It also reduces cloud data transfer costs.
If I run this in the Hashnode GraphQL Playground on my account, I get back the blog I just posted:

Making Hashnode API queries in Postman
While the Playground is nice, it’s not a full-fledged REST API dev environment. Fortunately, Postman understands GraphQL and can, like Playground, perform syntax completion in its editor. Plus Postman offers a more robust environment for developing and testing our API calls.
To make the above call in Postman, define a new POST request and enter https://gql.hashnode.com/ as the URL. Then, go to Body and, for the content type, select GraphQL. Postman will automatically download the Hashnode API GraphQL schema and use it for autocompletion. (Neat, huh?)
In the QUERY section of the request, paste in the GraphQL code we used above. In my example below, I’ve removed the hard-coded blog name and defined it as an environment variable. (This makes it easier to switch environments during different phases of the dev/test process.)
Select Send to send the request. You’ll see we received the same response back that we got in the Playground. You can continue to develop your Hashnode API requests like this before moving them into your product.
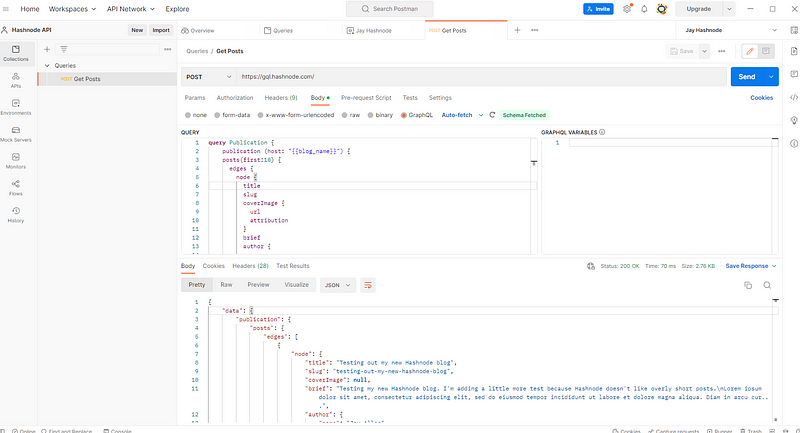
Notice that GraphQL is just our query language. The response comes back as regular ol’ JSON, which you can parse and traverse using your framework’s built-in JSON tooling.
Performing authenticated requests
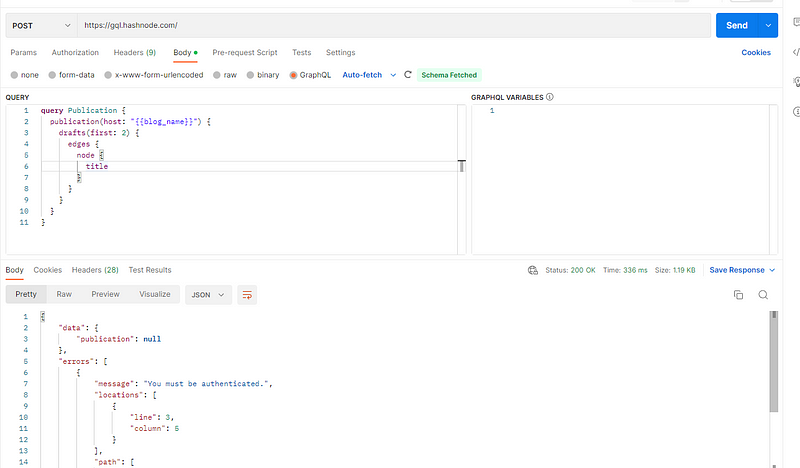
What if you need to make an authenticated request? An example is retrieving drafts, which are private data since they’re unpublished:
query Publication {
  publication(host: "{{blog_name}}") {
    drafts(first: 2) {
      edges {
        node {
          title
        }
      }
    }
  }
}
If you make this call with no authentication information as a POST request in Postman, you’ll get an error:
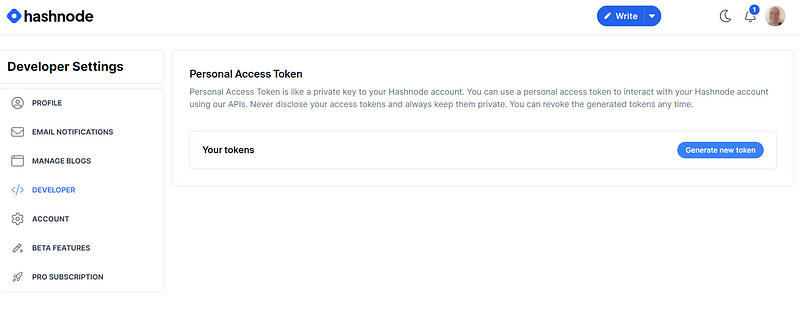
To authorize this call, we’ll need a Personal Access Token (PAT). You can generate a PAT from Hashnode for your account by going to Account Settings → Developer and, in Personal Access Token, selecting Generate new token.
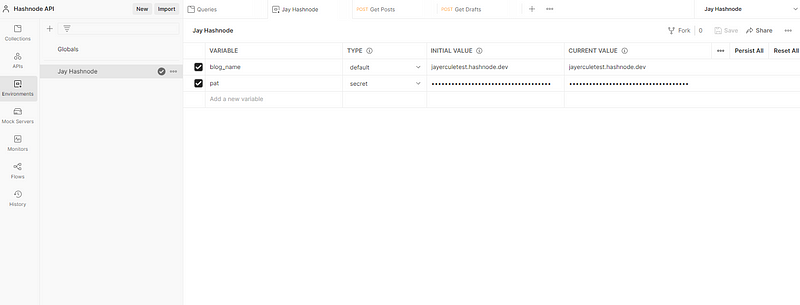
Once you have the PAT, copy it and add it to your current Postman environment as a secret variable to keep it secure.
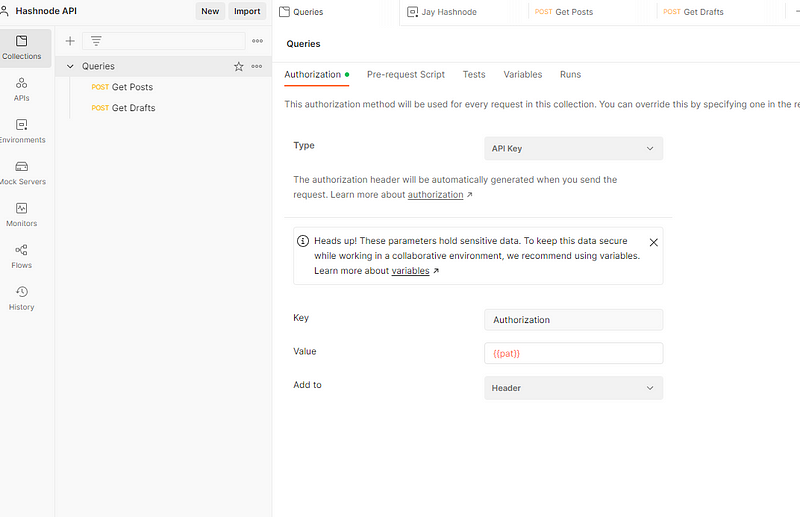
Then, double-click the collection containing your Hashnode API requests and, on the Authentication tab, select API Key and set the Authentication key using the value of the environment variable.
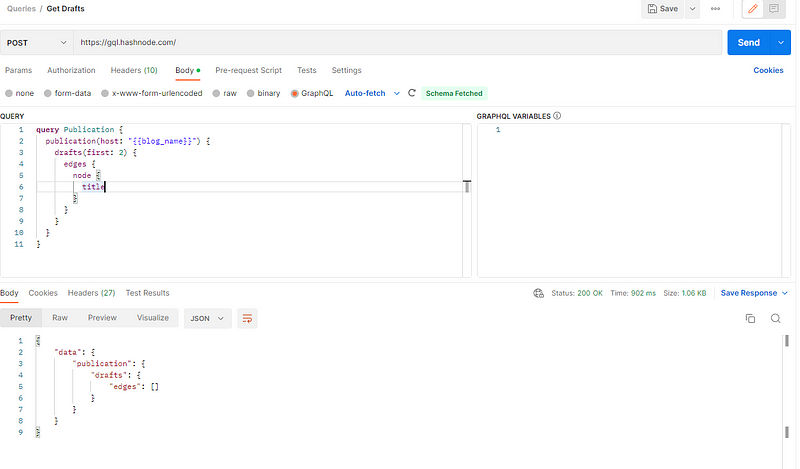
If you haven’t already, create a POST request for the drafts call. By default, it will use the authentication type you configured for the collection, so there’s no need to set authentication explicitly.
Now, if you make this call, you should see a valid response. In this case, since I have no drafts, my collection is empty.
Conclusion
A headless CMS provides a powerful back-end for content management while offering a flexible, API-based front-end for integrating the end product into your Web site. Hashnode’s entry into this space gives tech companies a powerful tool for managing content while also reaching a wider audience.
At Ercule, I help our clients create high-quality technical content that enables engineers and influences decision-makers. Contact us today to see how we can help you take your developer-oriented content to the next level.